
Red Velvet Thumbprint Cookies with Cream Cheese

Soft, buttery red velvet cookies filled with a tangy-sweet cream cheese center — a festive, crowd-pleasing treat perfect for holidays and everyday celebrations.
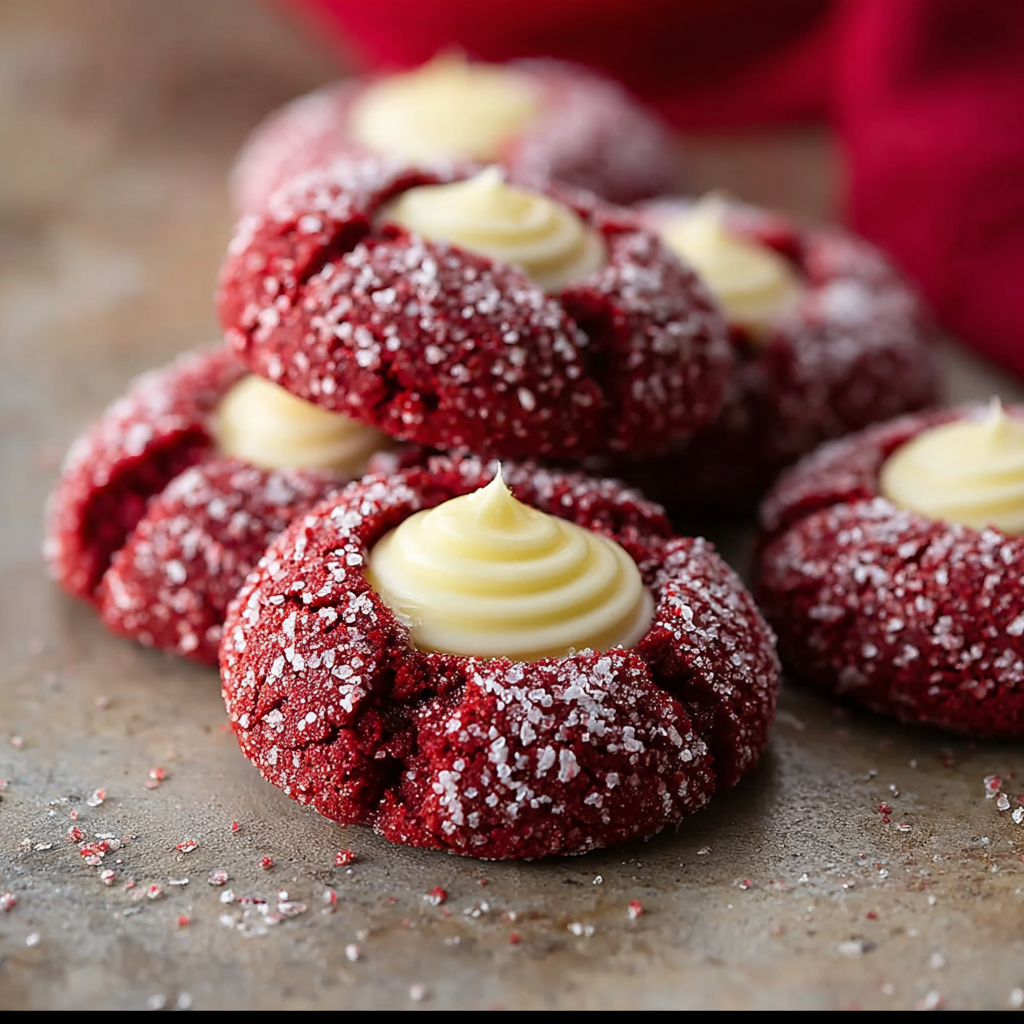
This recipe for Red Velvet Thumbprint Cookies with Cream Cheese has been my go-to for every holiday cookie swap and last-minute get-together for years. I first discovered the magic of a red velvet dough paired with a silky cream cheese center on a snowy December afternoon when I wanted something colorful and comforting to bring to a neighbor's brunch. The texture is what makes these so memorable: a tender, buttery cookie with a slightly crisp edge and a soft, pudding-like center of cream cheese that melts into every bite.
I love how simple ingredients—common pantry staples and a little red food coloring—turn into something that feels elevated. The cocoa powder gives a subtle cocoa backbone without making the cookies taste like chocolate, while the cream cheese filling adds a tangy contrast that balances the sweetness beautifully. These cookies are easy to shape, travel well when packed, and always steal the show at parties because of their vivid color and charming thumbprint shape.
Why You'll Love This Recipe
- Easy to make with pantry staples: uses butter, sugar, flour, cocoa, and cream cheese—no specialty items required and most home bakers will have these on hand.
- Quick prep and short bake time: active prep takes about 20 minutes and baking is just 12 to 15 minutes per batch, so you can have a tray warm from the oven in under 40 minutes.
- Perfect for make-ahead and gifting: dough can be chilled and baked later or cookies can be frozen for up to 3 months; ideal for cookie exchanges and holiday trays.
- Kid-friendly shaping: rolling into 1-inch balls and pressing with your thumb makes this a fun, approachable activity for little helpers.
- Visually striking: the deep red color contrasts beautifully with the pale cream cheese filling, making them look professional with minimal effort.
When I first served these at a family gathering, everyone kept asking how they were made. My nephew declared them "fancy cookies," which he only calls things he thinks are special. Over the years I've tweaked the balance of sugar and the thickness of the filling; this version delivers consistent results and always brings smiles.
Ingredients
- Unsalted butter (1 cup): Softened to room temperature so it creams smoothly with sugar; use a reliable brand like Land O'Lakes or Kerrygold for a rich flavor. Room-temp butter traps air for a tender crumb.
- Granulated sugar (1 cup): Provides structure and a slight crispness around the edges. Measure by spooning into the cup and leveling off for accuracy.
- Large egg (1): Brings moisture and helps bind the dough. Use an egg at room temperature for better emulsification.
- Vanilla extract (1 tsp): Adds aromatic depth—use pure vanilla extract rather than imitation for best flavor.
- Cocoa powder (2 tbsp): Unsweetened Dutch-process or natural cocoa both work; Dutch-process gives a darker color and smoother chocolate note.
- Red food coloring (1 tbsp): Liquid or gel both work; gel yields more intense color with less liquid. Start with 1 tablespoon and adjust slightly if you prefer a brighter hue.
- All-purpose flour (2 cups): Spoon and level into the measuring cup for accuracy. The flour provides structure while keeping the cookies tender.
- Baking powder (1/2 tsp): Gives a gentle lift so the cookies keep a soft center and slightly domed shape.
- Salt (1/4 tsp): Enhances the chocolate and balances the sweetness; use fine salt for even distribution.
- Cream cheese (4 oz): Softened for the filling—Philadelphia cream cheese is classic. Soften at room temperature for easy mixing.
- Powdered sugar (1/2 cup): Sifted into the cream cheese for a silky filling without lumps.
Instructions
Preheat and prepare: Preheat the oven to 350°F (175°C) and line a baking sheet with parchment paper so cookies bake evenly without sticking. Arrange a cooling rack nearby. If you plan to bake multiple batches, have two sheets ready so one cools while the other bakes. Cream the butter and sugar: In a large mixing bowl, cream together 1 cup softened unsalted butter and 1 cup granulated sugar until the mixture is light and fluffy—about 2 to 3 minutes with a hand mixer or 4 minutes with a stand mixer on medium speed. This step aerates the dough, producing a tender cookie with lift. Add egg and vanilla: Beat in 1 large room-temperature egg and 1 teaspoon vanilla extract until fully incorporated and glossy. Scrape down the bowl to ensure even mixing so the color and texture remain uniform. Flavor and color: Mix in 2 tablespoons cocoa powder and 1 tablespoon red food coloring until the dough is uniformly colored. Gel coloring will give a deeper hue with less added moisture. If using liquid color, you may need a touch more to reach a vivid red. Add dry ingredients: Gradually add 2 cups all-purpose flour, 1/2 teaspoon baking powder, and 1/4 teaspoon salt, mixing on low until just combined. Avoid overmixing to keep the texture soft; stop when you no longer see dry streaks of flour. Shape and indent: Roll the dough into 1-inch balls using lightly floured hands and place them about 1 inch apart on the prepared baking sheet. Use your thumb (or the back of a teaspoon) to press a shallow indentation into the center of each ball—do this gently so the sides hold their shape during baking. Prepare the filling: In a small bowl, beat together 4 ounces softened cream cheese and 1/2 cup powdered sugar until smooth and creamy. Keep the filling chilled until you are ready to fill so it holds shape when baked. Fill and bake: Spoon a small amount (about 1/2 teaspoon) of the cream cheese mixture into each indentation. Bake for 12 to 15 minutes, or until the edges are set and the centers look slightly soft. Allow cookies to cool on the sheet for 5 minutes, then transfer to a wire rack to cool completely so centers set without collapsing.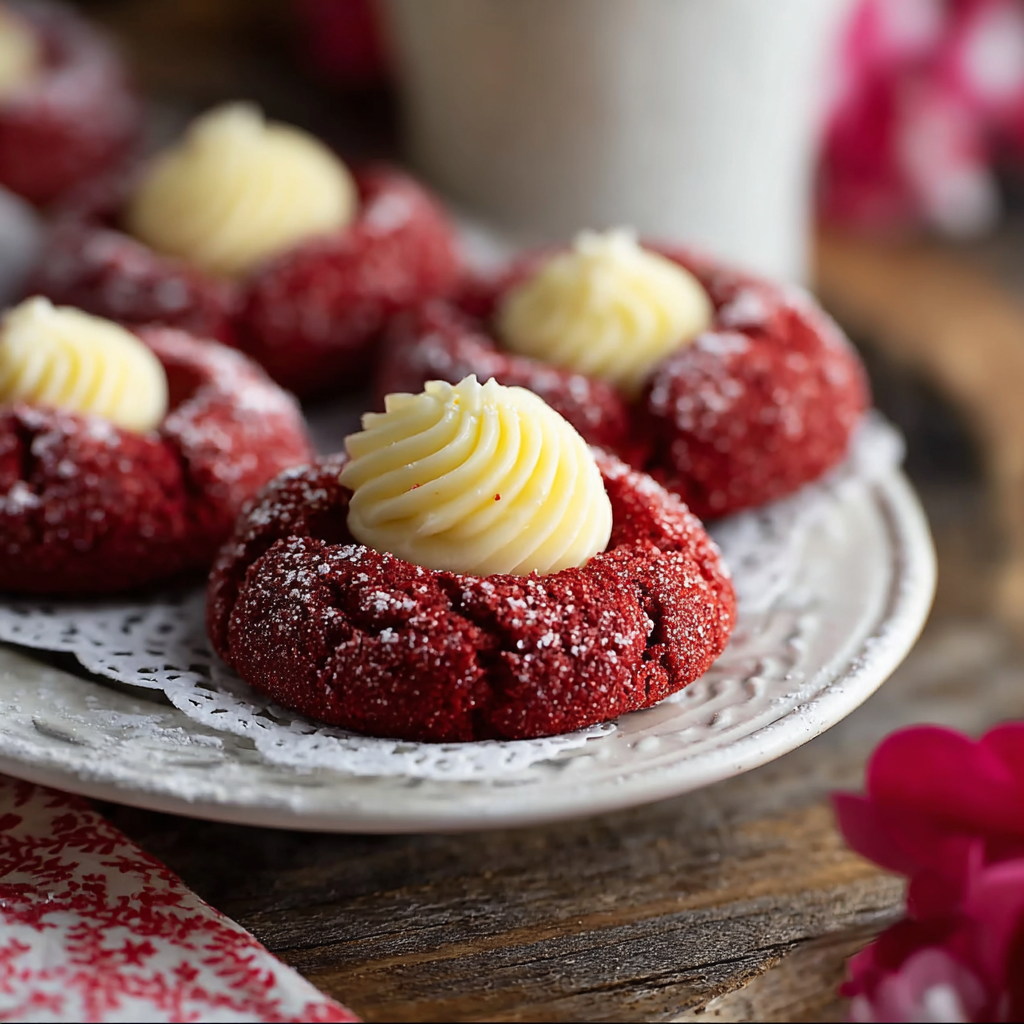
You Must Know
- These cookies freeze well: bake them fully and freeze in an airtight container for up to 3 months; thaw at room temperature and enjoy.
- High in both butter and sugar, they are best stored at room temperature for 2 days or refrigerated up to 5 days because of the cream cheese center.
- One batch yields approximately 24 to 30 cookies depending on the exact size of your dough balls—adjust yield accordingly.
- To avoid cracked centers, do not overfill with the cream cheese mixture; a small spoonful is sufficient so the filling stays soft but contained.
My favorite thing about these is how forgiving they are—if a cookie spreads a little more than expected, the cream cheese filling hides imperfections and still looks beautiful. A tray of these will disappear quickly at any party; friends often ask me for the recipe after the first bite.

Storage Tips
Store baked cookies in an airtight container at room temperature for up to 48 hours; beyond that, transfer to the refrigerator because of the cream cheese filling to prevent spoilage. If refrigerating, place a sheet of parchment between layers to prevent sticking and keep them from absorbing refrigerator odors. For longer storage, arrange cookies in a single layer on a baking sheet and freeze for 1 hour, then transfer to a freezer-safe container or bag; they will keep for up to 3 months. To reheat from frozen, let them thaw on the counter for 30 minutes or warm briefly in a 275°F oven for 5 minutes to refresh the texture.
Ingredient Substitutions
If you prefer to reduce dairy, try replacing the butter with a high-quality vegan stick margarine and use vegan cream cheese for the filling—note the flavor and texture will be slightly different and softer. To make them gluten-free, substitute a 1:1 gluten-free flour blend that includes xanthan gum; expect slightly different spread and a tender crumb. For a less sweet filling, reduce powdered sugar to 1/3 cup and add 1/4 teaspoon lemon zest to brighten the cream cheese. If you don’t have red food coloring, a combination of beet powder and a tiny bit of liquid red dye can create a natural hue but may add a faint earthy note.
Serving Suggestions
These are delightful plated on a simple white platter so the red and white contrast shines. Serve with coffee or a lightly sweetened milk for breakfast gatherings, or pair with sparkling wine or dessert cocktails at evening parties. Garnish with a light dusting of powdered sugar or a tiny curl of white chocolate for a holiday touch. They also make charming favors—pack three in a cello bag and tie with ribbon for guests to take home.
Cultural Background
Red velvet has roots in early 20th-century American baking, where cocoa and buttermilk produced a distinctive red-brown hue that became associated with special occasions. Over time, the color became more pronounced with added food coloring, and desserts like cakes and cookies adopted the eye-catching shade. Thumbprint cookies have European origins; combining the two yields a hybrid that feels both classic and modern—festive, nostalgic, and rooted in home-baking traditions across the U.S.
Seasonal Adaptations
For winter holidays, add a pinch of cinnamon and swap a teaspoon of vanilla for almond extract to create a warm, festive profile. In Valentine’s season, top each filled thumbprint with a single heart-shaped sprinkles or a few freeze-dried raspberry crumbs. For a lighter summer version, fold a teaspoon of lemon zest into the cream cheese filling and serve chilled, which adds brightness and balances the richness.
Success Stories
I once brought a tin of these to a neighborhood potluck where someone who claimed to dislike cream cheese changed their mind after one bite. A friend also used the dough as a base for sandwich cookies—baking slightly larger dough rounds, filling with the cream cheese, and pressing two together created a delightful sandwich cookie that disappeared before dessert was served. These personal moments remind me that a simple, well-executed treat can make gatherings feel warmer and more joyful.
Meal Prep Tips
Prepare the dough up to 24 hours in advance and keep it chilled in the refrigerator wrapped tightly; this develops flavor and makes rolling neater. The cream cheese filling can be mixed and stored in an airtight container for up to 48 hours. For efficient baking, chill rolled dough balls on a sheet for 15 minutes before baking to reduce spread and keep the indentations defined. Use a small cookie scoop to make consistent sizes so baking time is predictable.
These Red Velvet Thumbprint Cookies with Cream Cheese are a small but memorable treat—bright in color, rich in flavor, and wonderfully adaptable. Whether you’re baking for a holiday, a party, or a cozy afternoon at home, these cookies bring warmth and a touch of festive charm to any occasion. Make them yours by experimenting with fillings and finishes, and enjoy the little moments they create around the table.
Pro Tips
Use room-temperature butter and eggs for an even emulsion and smoother dough.
Chill rolled dough balls for 10–15 minutes to reduce spreading and keep thumbprints defined.
Spoon or pipe a small amount of filling—about 1/2 teaspoon—to prevent overflow during baking.
If using gel food coloring, start with less and add more for a vivid hue without extra liquid.
This nourishing red velvet thumbprint cookies with cream cheese recipe is sure to be a staple in your kitchen. Enjoy every moist, high protein slice — it is perfect for breakfast or as a wholesome snack any time.
FAQs about Recipes
Can I prepare the dough ahead of time?
Yes. Dough can be chilled up to 24 hours before baking. Chill helps develop flavor and prevents excessive spreading.
How long do these cookies keep in the freezer?
Freeze baked cookies in a single layer until firm, then stack with parchment between layers in a freezer-safe container for up to 3 months.
How do I make the filling less sweet?
If you prefer a brighter filling, reduce powdered sugar to 1/3 cup and add a scant 1/4 teaspoon lemon zest to taste.
Tags
Red Velvet Thumbprint Cookies with Cream Cheese
This Red Velvet Thumbprint Cookies with Cream Cheese recipe makes perfectly juicy, tender, and flavorful steak every time! Serve with potatoes and a side salad for an unforgettable dinner in under 30 minutes.
Ingredients
Cookies
Filling
Instructions
Preheat and prepare
Preheat oven to 350°F (175°C) and line a baking sheet with parchment paper. Have a cooling rack ready for finished cookies.
Cream butter and sugar
Beat 1 cup softened butter and 1 cup granulated sugar until light and fluffy, about 2–3 minutes with a mixer.
Add egg and flavor
Add 1 large egg and 1 teaspoon vanilla extract; beat until incorporated and glossy.
Add cocoa and color
Mix in 2 tablespoons cocoa powder and 1 tablespoon red food coloring until uniformly combined.
Combine dry ingredients
Gradually add 2 cups flour, 1/2 teaspoon baking powder, and 1/4 teaspoon salt, mixing until just combined.
Shape and indent
Roll dough into 1-inch balls, place on prepared sheet, and press an indentation into each with your thumb or a spoon.
Prepare filling
Beat 4 ounces softened cream cheese with 1/2 cup powdered sugar until smooth; spoon about 1/2 teaspoon into each indentation.
Bake and cool
Bake 12–15 minutes until edges are set. Cool on the sheet 5 minutes, then transfer to a rack to cool completely.
Last Step: Please leave a rating and comment letting us know how you liked this recipe! This helps our business to thrive and continue providing free, high-quality recipes for you.
Nutrition
Did You Make This?
Leave a comment & rating below or tag
@moodcooks on social media!
Categories:
You might also like...

Air Fryer Bang Bang Cauliflower
Crispy air-fried cauliflower tossed in a creamy sweet-spicy bang bang sauce — a crunchy, vegetarian appetizer or weeknight favorite that's ready in about 30 minutes.

Air Fryer Buffalo Cauliflower
Crispy battered cauliflower florets tossed in tangy buffalo sauce — a spicy, vegetarian crowd-pleaser ready in under 40 minutes.
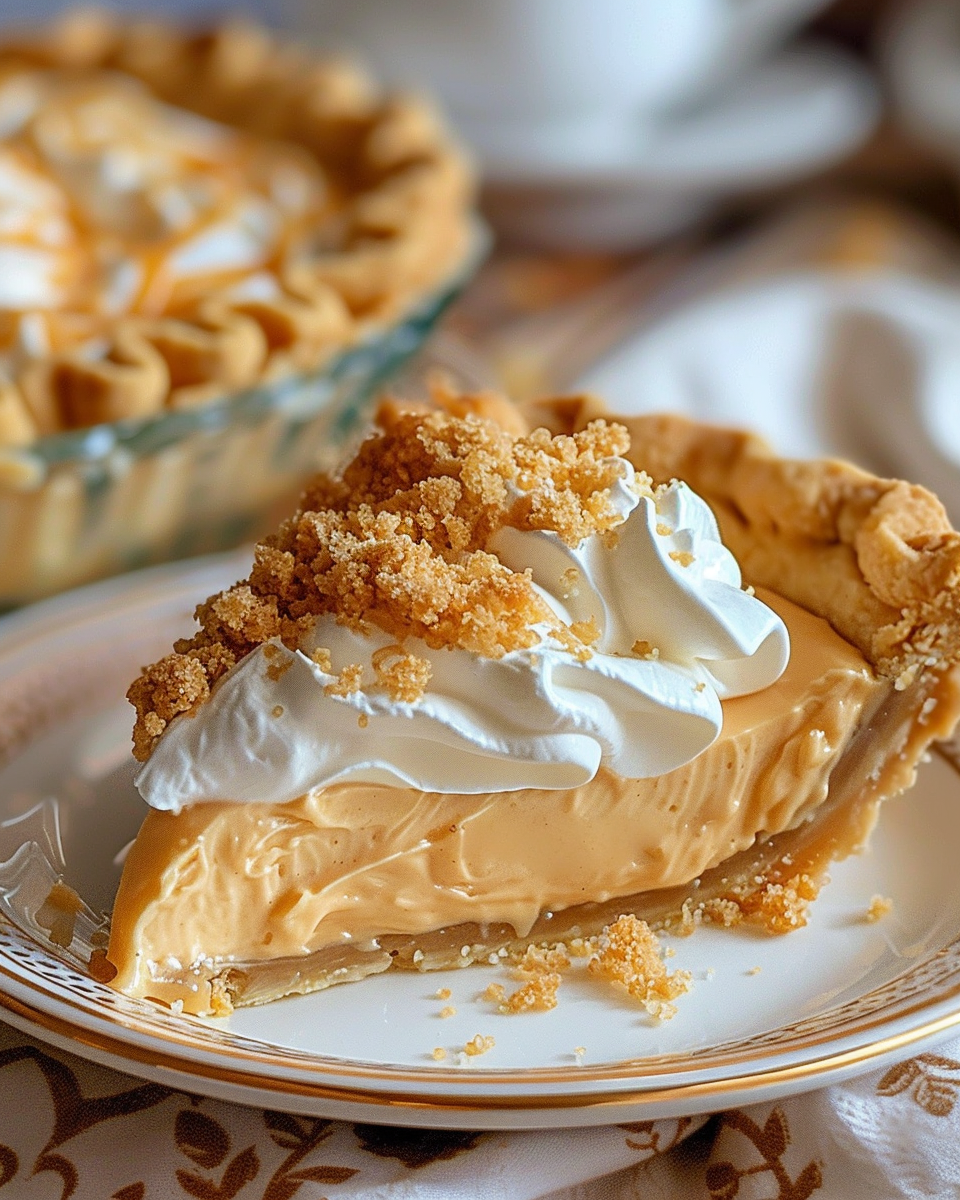
Amish Peanut Butter Cream Pie
A nostalgic, no-bake peanut butter cream pie inspired by Amish kitchens—silky peanut butter filling, crunchy crumbles, and pillowy whipped topping in a buttery 9-inch crust.
Did You Make This?
Leave a comment & rating below or tag @moodcooks on social media!
Rate This Recipe
Share This Recipe
Enjoyed this recipe? Share it with friends and family, and don't forget to leave a review!
Comments (1)
This recipe looks amazing! Can't wait to try it.
Comments are stored locally in your browser. Server comments are displayed alongside your local comments.

Hi, I'm Olivia!
What's Popular
30-Minute Meals!
Join to receive our email series which contains a round-up of some of our quick and easy family favorite recipes.