
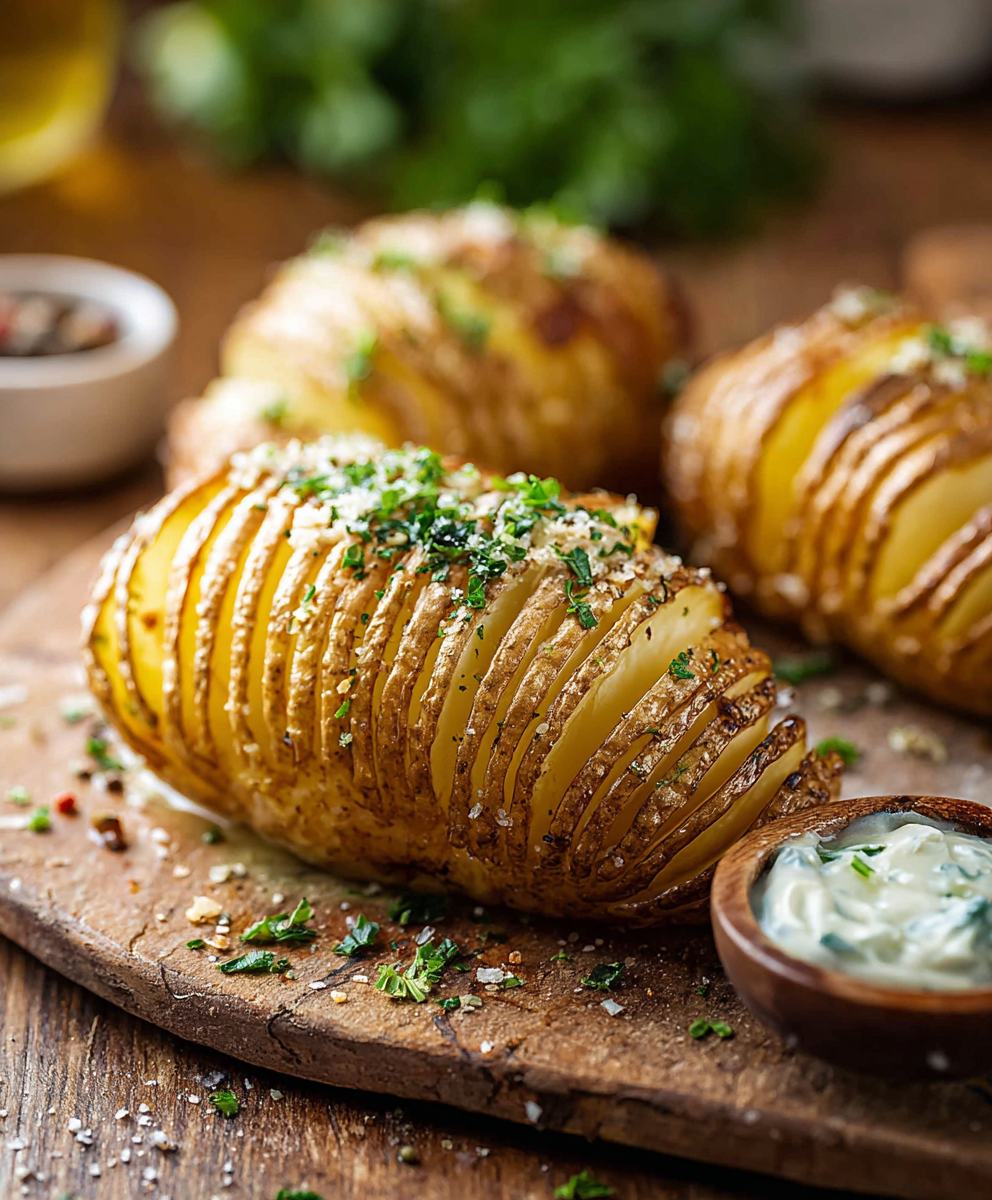
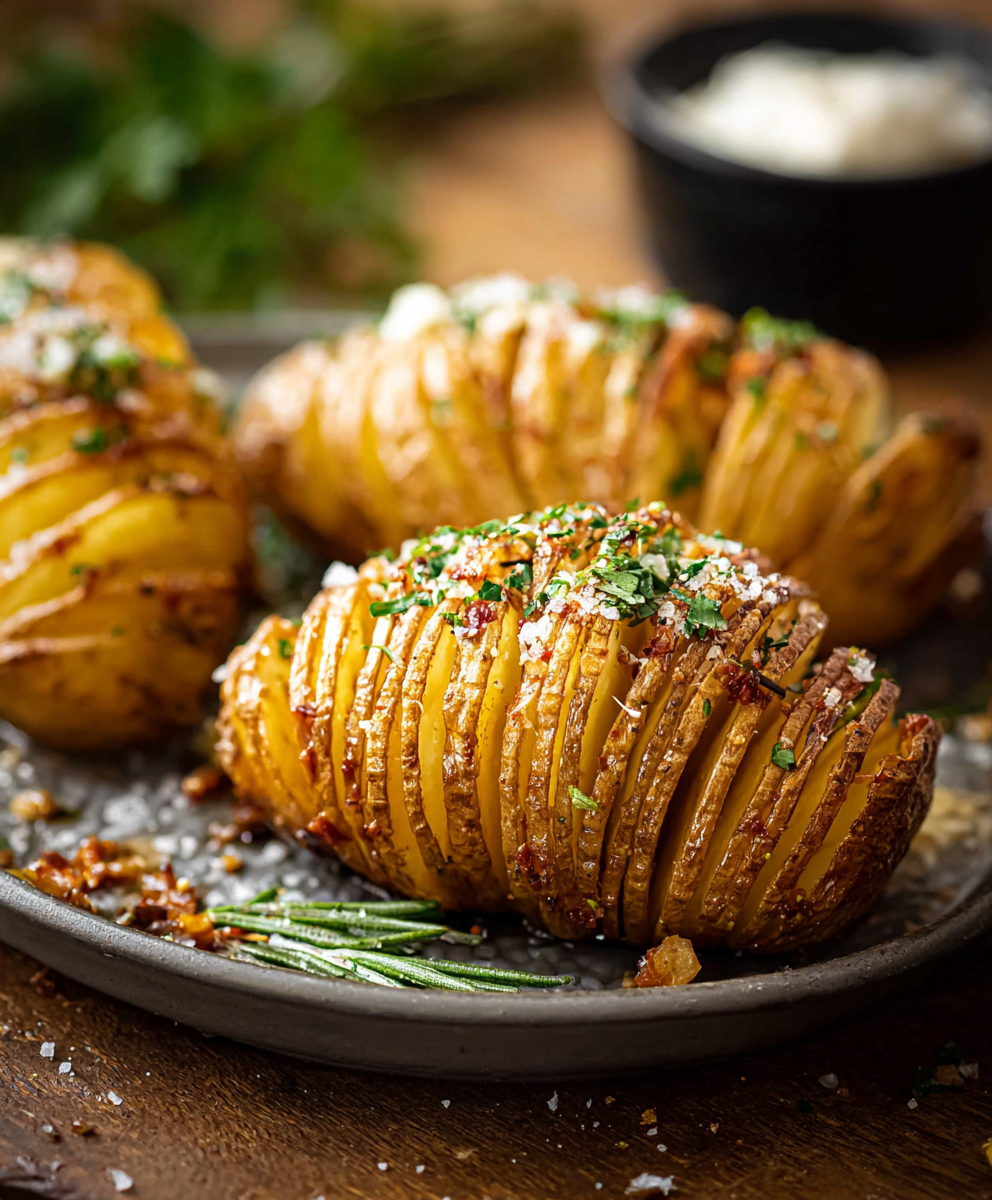
Crispy Hasselback Potatoes

Thinly sliced, butter-brushed russet potatoes baked until crisp on the outside and tender inside — a showstopping side that’s effortless to make.

This recipe for Hasselback potatoes has been one of those joyful discoveries that started as an experiment and then quietly became a family favorite. I first tried this method the winter I wanted something more elegant than mashed potatoes for a holiday dinner but without extra fuss. The technique — slicing the potato thinly but leaving the base intact — creates a beautiful fan-like presentation and increases the surface area so every bite gets crisp edges and soft insides. The aroma of butter and baked potato that filled my kitchen that night made the whole house gather around the oven door like it was magic.
What makes these potatoes special is their contrast in texture: the edges turn golden and crackly while the centers stay tender and silky. They take ordinary russet potatoes and elevate them into something that looks and tastes gourmet but requires only a few pantry staples and straightforward technique. I love serving them when I want to impress guests without stressing in the kitchen — they’re hands-off once in the oven and pair beautifully with everything from roasted meats to simple salads.
Why You'll Love This Recipe
- Effortless elegance: These transform simple potatoes into an attractive centerpiece with minimal effort and no special equipment beyond a sharp knife and chopsticks or skewers.
- Quick to prepare: Active prep time is about 15 minutes and total time is roughly 60–70 minutes, meaning you can have a striking side dish ready for weeknight dinners or entertaining.
- Pantry-friendly ingredients: Uses common items — russet potatoes, butter, salt, and pepper — so you can make them on a moment’s notice without a special shopping trip.
- Make-ahead friendly: You can slice the potatoes ahead of time and refrigerate them until you're ready to bake, saving time on busy days or holiday prep.
- Crowd-pleasing: Crispy edges and buttery flavor appeal to kids and adults alike; picky eaters often ask for seconds.
- Flexible and seasonal: Easy to dress up with herbs, grated cheese, or a garlic-parsley finish for different occasions.
From the first time I served these at a casual dinner, guests were impressed — not just by the look but by how buttery and satisfying they were. My partner still remembers the crisp edges as “that part you want first,” and my grandmother asked for the recipe after the second serving. Over the years I’ve learned small technique tweaks that make them reliably crisp every time, and I share those in the instructions below.
Ingredients
- Russet potatoes: Use 4 large russet potatoes (about 10–12 ounces / 280–340 g each). Choose firm, dry spuds with smooth skins — they hold their shape and develop the best contrast between crisp edges and fluffy centers. I prefer the russet variety for its starchy interior and excellent roasting behavior.
- Unsalted butter: 4 tablespoons melted, divided (that’s 1/4 cup total). Unsalted allows you to control seasoning; if using salted butter reduce added salt slightly. High-quality butter adds depth and browning.
- Kosher salt: 1 teaspoon for initial seasoning. Kosher salt dissolves easily and seasons uniformly — if using table salt, use about half the amount.
- Black pepper: 1/2 teaspoon freshly ground for best flavor; plus extra for finishing. Freshly cracked pepper has more aromatic punch than pre-ground.
- Additional salt and pepper: To taste after baking; coarse flake salt like Maldon makes a lovely final finish if you have it.
Instructions
Preheat and prepare: Arrange an oven rack in the middle position and preheat to 425°F. Use an unlined baking sheet to encourage browning — the direct sheet surface helps crisp the underside of the potato. Allow the oven to come fully to temperature before baking for consistent results. Slice the potatoes: Place one potato between two chopsticks or thin skewers. Using a sharp chef’s knife, make vertical cuts about 1/8 inch apart, slicing straight down until the knife hits the chopsticks; this prevents you from cutting all the way through. Work steadily but without forcing the blade; a slight sawing motion helps keep even slices. Repeat with remaining potatoes. Butter and season: Arrange the potatoes on the unlined baking sheet. Use a pastry brush to coat the potatoes all over with about half of the melted butter, making sure some butter gets down into the slits to flavor the interior layers. Sprinkle with 1 teaspoon kosher salt and 1/2 teaspoon freshly ground black pepper, scattering seasoning into the slits where possible. Bake the first stage: Bake the potatoes for 30 minutes. This initial high-heat stage begins browning and helps the slices fan open slightly. Oven temperature and potato size affect times, so start checking visually for gentle separation between slices at this point. Open and refresh: Remove the baking sheet and use a butter knife to gently pry the slices apart a bit — this increases surface area for crisping. Brush the remaining melted butter over the potatoes, again coaxing it into the slits so edges crisp and centers stay moist. Finish baking: Return to the oven and bake an additional 30–35 minutes, or until the potatoes are deeply golden and crisp on the edges and a skewer inserted near the center meets little resistance. Larger potatoes may need a few extra minutes; watch closely to avoid excessive browning. Serve warm: Remove from the oven, season with additional salt and pepper to taste, and serve immediately so the crisp edges are at their best.
You Must Know
- These are best served fresh: the crisp edges lose their snap as they cool, so plan to serve immediately after baking for maximum textural contrast.
- They freeze well after baking for up to 3 months if wrapped tightly; reheat in a 400°F oven to restore crispness rather than microwaving, which makes them soft.
- High in complex carbohydrates: a large russet provides sustained energy; add a protein to make the plate more balanced for a meal.
- Butter is the key flavor: substituting an oil will change browning behavior and mouthfeel — clarified butter or olive oil are viable alternatives with slight flavor shifts.
My favorite aspect is how unassuming the ingredients are yet how dramatic the result looks on the table. I remember serving these at a small anniversary dinner; the presentation drew genuine oohs and ahhs, and the host commented that the technique made the ordinary feel special. Little rituals — like using a flaky finishing salt — turned a simple side into a moment of celebration.
Storage Tips
To store leftovers, allow the potatoes to cool completely, then place in an airtight container and refrigerate for up to 3 days. For longer storage, freeze baked potatoes individually wrapped in foil then placed in a freezer bag for up to 3 months. Reheat in a preheated 400°F oven for 10–15 minutes from refrigerated and 20–25 minutes from frozen to help restore crisp edges. Avoid reheating in the microwave unless you’re in a hurry — it will make the slices soft rather than crisp.
Ingredient Substitutions
If you don’t have butter or want a dairy-free option, use 1/4 cup of a neutral oil (like avocado or vegetable) or 3 tablespoons olive oil plus 1 tablespoon melted vegan butter for flavor. Swap russets for Yukon Golds for a creamier interior and slightly less crisp edges; reduce total bake time by about 5–10 minutes for smaller spuds. For a garlicky version, mix 1–2 minced garlic cloves into the melted butter and brush as directed.
Serving Suggestions
These pair beautifully with roast chicken, steak, or a simple green salad. For a bright contrast, finish with a spoonful of sour cream or crème fraîche and a sprinkle of chopped chives or parsley. For a richer take, grate 1/2 cup Parmesan or gruyère over the potatoes in the last 10 minutes of baking so the cheese melts and browns slightly. They also work well as an appetizer with a dipping sauce like garlic aioli or herbed sour cream.
Cultural Background
Hasselback potatoes originated in Sweden in the 1940s and were named after the Hasselbacken restaurant in Stockholm, where the method was popularized. The technique reflects Scandinavian simplicity: minimal ingredients, precise technique, and emphasis on texture. Across the globe the method has been adapted with regional flavors — think curry powder in India, miso butter in Japan, or za’atar in the Middle East — each variation honoring the core idea of thinly sliced, layered potato.
Seasonal Adaptations
In autumn and winter, top baked potatoes with roasted garlic, sautéed mushrooms, or caramelized onions for cozy, hearty flavors. In spring and summer, finish with a spoonful of lemon-herb yogurt and fresh herbs for brightness. Holiday adaptations include brushing with brown butter and scattering toasted hazelnuts, or finishing with grated aged cheese and a few fried sage leaves for an aromatic, festive touch.
Meal Prep Tips
Slice the potatoes up to a day ahead and store them submerged in cold water in the refrigerator to prevent browning. When ready to bake, pat them dry very well so they crisp properly, then proceed with buttering and seasoning. If you prefer to cook in batches, bake at full temperature and keep finished potatoes warm on a wire rack in a low oven (about 200°F) so they maintain texture without steaming.
These potatoes are a perfect bridge between simple weeknight comfort and impressive entertaining fare. Try them once and you’ll find as I did that a small technique makes a big difference — and that you’re likely to reach for this method whenever you want a little extra flair with very little extra work.
Pro Tips
Use chopsticks or skewers to prevent cutting through the base and to keep slices evenly separated.
Brush butter into the slits as well as over the top to ensure the interior layers are flavored and crisp up.
Let the potatoes rest a minute after baking before serving so they hold their shape but serve while still hot for best texture.
For extra crunch, sprinkle 1–2 tablespoons of panko or grated cheese in the last 8–10 minutes of baking.
This nourishing crispy hasselback potatoes recipe is sure to be a staple in your kitchen. Enjoy every moist, high protein slice — it is perfect for breakfast or as a wholesome snack any time.
FAQs about Recipes
Can I prep the potatoes ahead of time?
Yes — slice them ahead and keep submerged in cold water to prevent browning, then pat dry before baking.
Why aren't my potatoes getting crispy?
Use an oven thermometer to ensure it has reached 425°F; baking on an unlined sheet helps the bottoms crisp.
Tags
Crispy Hasselback Potatoes
This Crispy Hasselback Potatoes recipe makes perfectly juicy, tender, and flavorful steak every time! Serve with potatoes and a side salad for an unforgettable dinner in under 30 minutes.
Instructions
Preheat and prepare
Position an oven rack in the middle and preheat oven to 425°F. Prepare an unlined baking sheet and have chopsticks or skewers ready to set limits for slicing.
Slice potatoes between chopsticks
Place each potato between two chopsticks or thin skewers. Using a sharp knife, make vertical 1/8-inch apart cuts, slicing until the knife hits the chopsticks to leave the base intact.
Brush with butter and season
Arrange potatoes on the baking sheet. Brush with half the melted butter, making sure some gets into the slits. Sprinkle with 1 teaspoon kosher salt and 1/2 teaspoon black pepper.
Bake first stage
Bake for 30 minutes at 425°F to begin browning and allow the slices to separate slightly.
Open the slices and finish
Remove from oven, gently pry slices apart with a knife, brush with remaining melted butter, then return to the oven and bake for an additional 30–35 minutes until crisp and tender.
Season and serve
Remove from oven, add additional salt and pepper to taste, and serve warm immediately for optimal texture.
Last Step: Please leave a rating and comment letting us know how you liked this recipe! This helps our business to thrive and continue providing free, high-quality recipes for you.
Nutrition
Did You Make This?
Leave a comment & rating below or tag
@moodcooks on social media!
Categories:
You might also like...
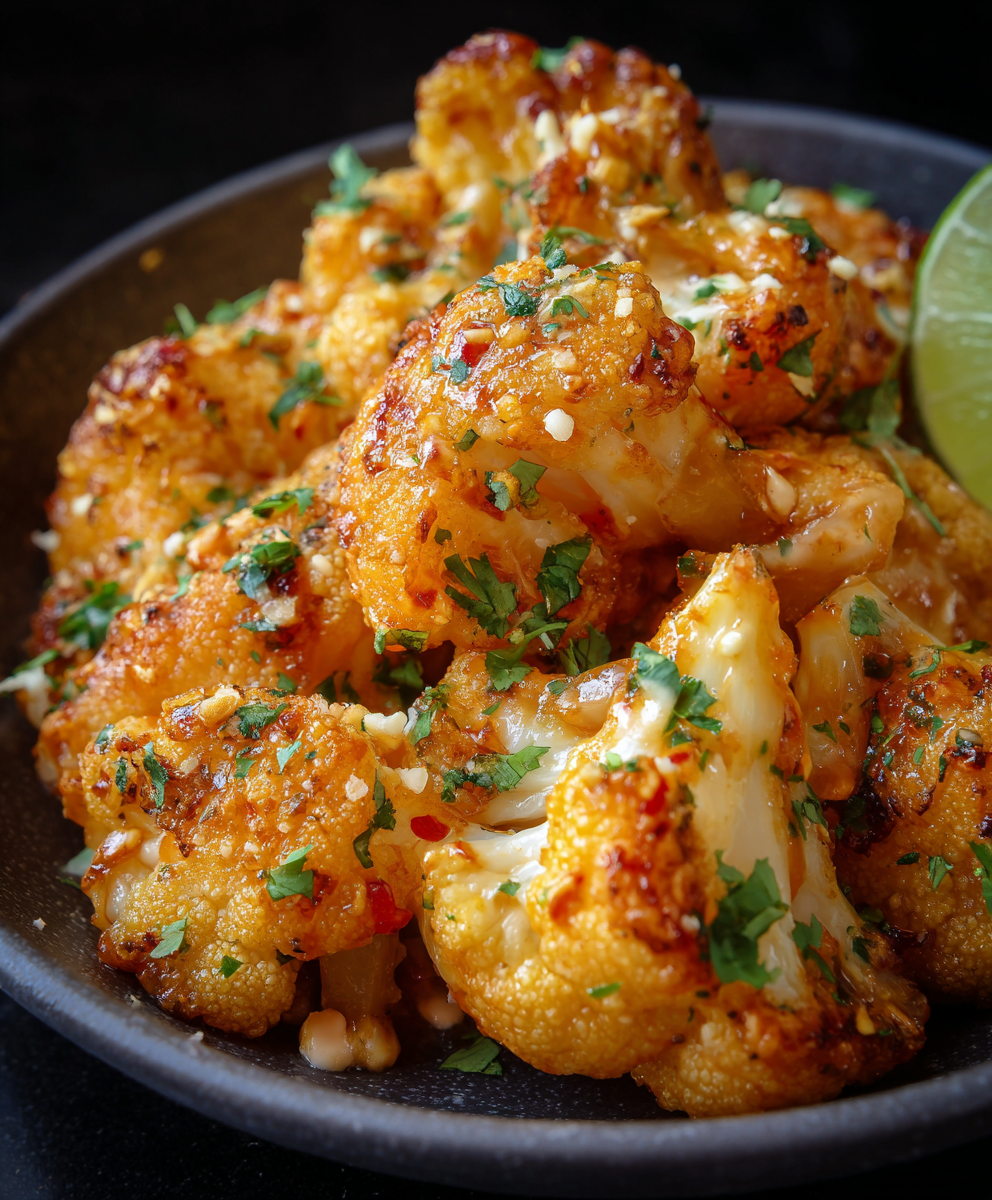
Air Fryer Bang Bang Cauliflower
Crispy air-fried cauliflower tossed in a creamy sweet-spicy bang bang sauce — a crunchy, vegetarian appetizer or weeknight favorite that's ready in about 30 minutes.

Air Fryer Buffalo Cauliflower
Crispy battered cauliflower florets tossed in tangy buffalo sauce — a spicy, vegetarian crowd-pleaser ready in under 40 minutes.
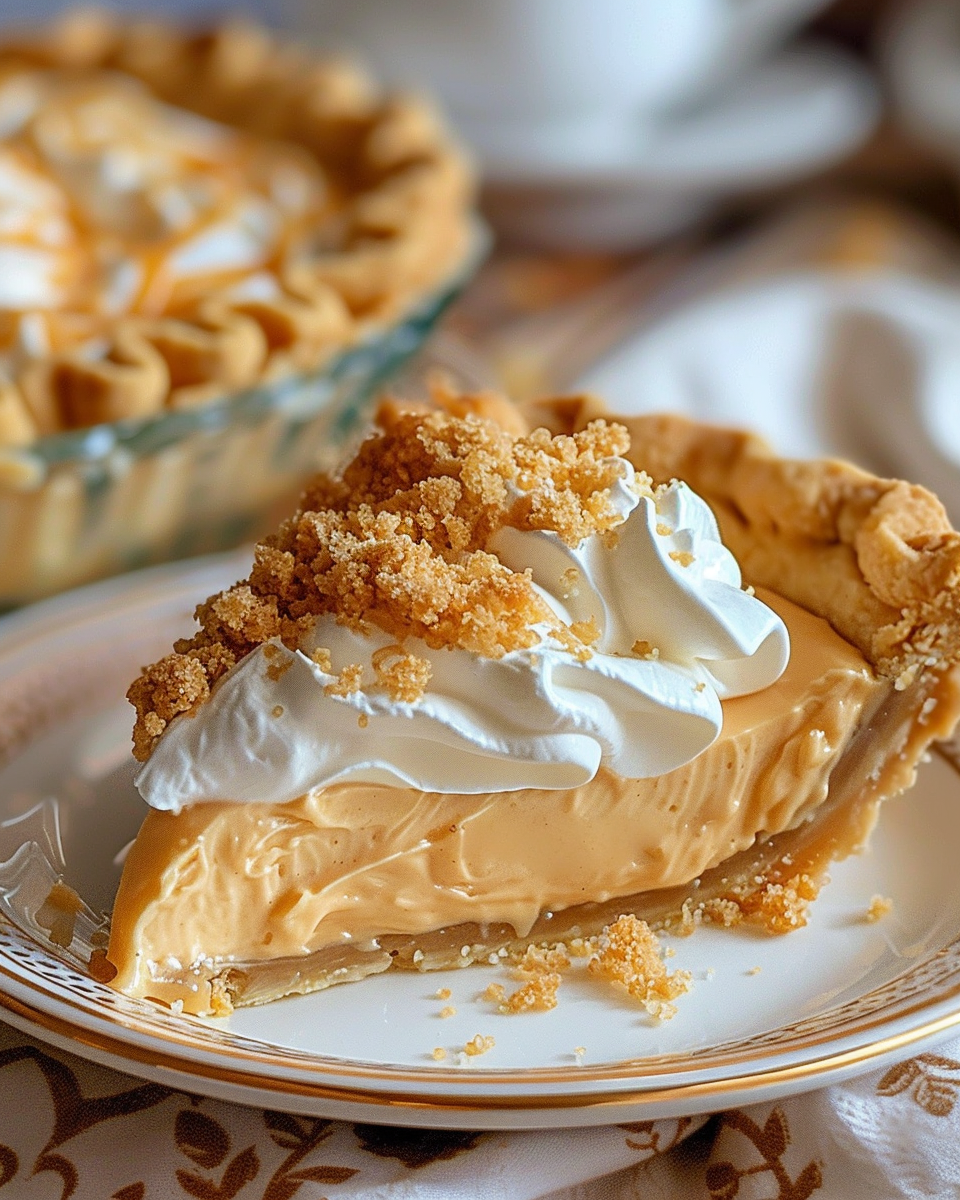
Amish Peanut Butter Cream Pie
A nostalgic, no-bake peanut butter cream pie inspired by Amish kitchens—silky peanut butter filling, crunchy crumbles, and pillowy whipped topping in a buttery 9-inch crust.
Did You Make This?
Leave a comment & rating below or tag @moodcooks on social media!
Rate This Recipe
Share This Recipe
Enjoyed this recipe? Share it with friends and family, and don't forget to leave a review!
Comments (1)
This recipe looks amazing! Can't wait to try it.
Comments are stored locally in your browser. Server comments are displayed alongside your local comments.

Hi, I'm Olivia!
What's Popular
30-Minute Meals!
Join to receive our email series which contains a round-up of some of our quick and easy family favorite recipes.